Building an Interview Schedule means adding time slots that can be customised and later taken by students.
This resource breaks down the two methods of building approved Interview Schedules:
- Immediately after approval, when the interview is approved by clicking:
- Approve on the Interviews page.
- Approve and Build Schedule on the Interview Details page.
- At a later date by clicking the:
- Apply Requested Template button listed in the centre of the Interview Details page.
- Build Interview Schedule Slots button listed under the Actions section of the Interview Details page.
Immediately after approval
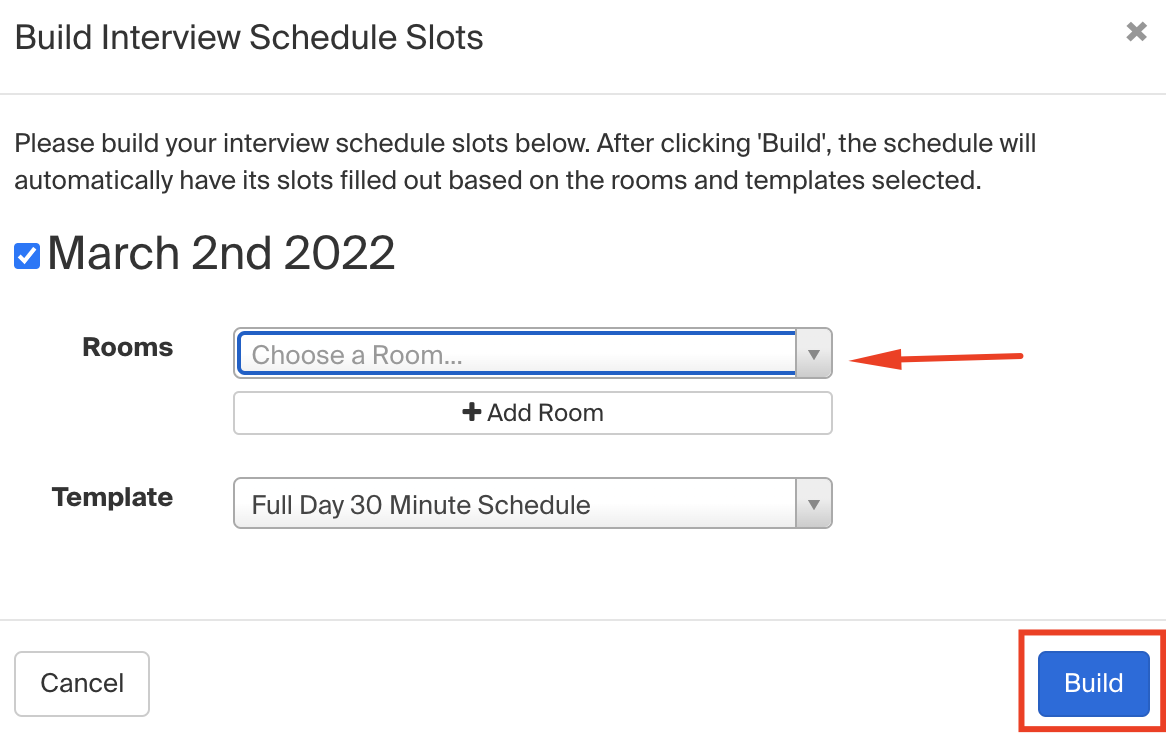
When an interview is approved from the Interviews page, or if you chose the Approve and Build Schedule option from the Interview Details page, a pop-up appears immediately.
Take the actions below within the pop-up:
- Rooms: select a Room for the interview to occur by clicking the dropdown arrow to the right of the Choose a Room... search box.
- Add additional rooms (if needed) by clicking the + Add Room button.
- Template: Confirm the pre-selected template.
- If another template should be selected, click the dropdown arrow to the right of the Template box to choose a another available template.
- To create a template, refer to Institution Settings: Interview Schedule Templates.
- Click the blue Build button in the lower right corner to save and build the interview schedule!
At a later date
If you previously approved the interview and need to build a schedule, you have two options from the Interview Details page.
1. The Apply Requested Template button in the middle of the page to build the requested schedule.
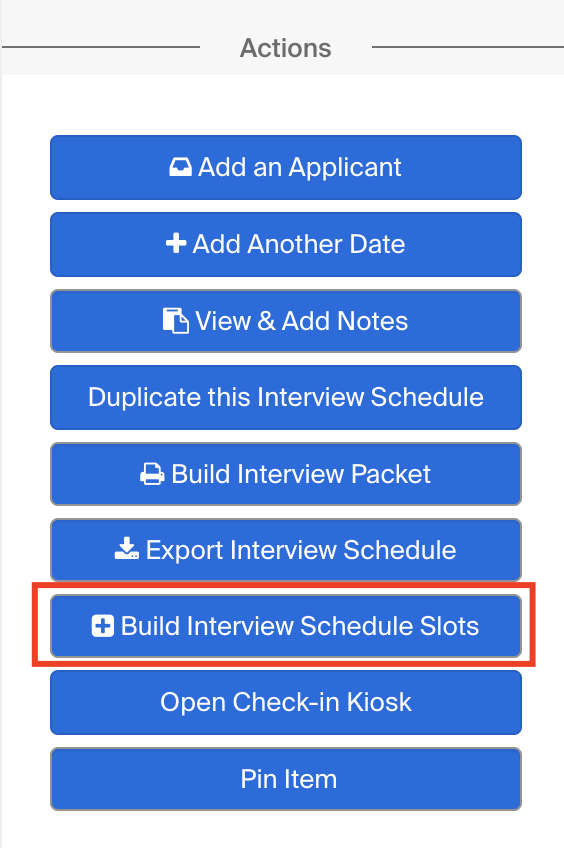
2. The Build Interview Schedule Slots button listed under the Actions section of the Interview Details page.
Apply Requested Template Button
In the centre of the Interview Details page, confirm the selected template and click the blue Apply Requested Template button.

Note: a room will not be assigned to the schedule using this workflow. Follow the steps outlined in How to Edit an Interview Schedule to update the room.
Build Interview Schedule Slots button
Click the blue Build Interview Schedule Slots button under the Actions section on the left of the Interview Details page.
Take the actions below within the pop-up:
- Rooms: Select a Room for the interview to occur by clicking the dropdown arrow to the right of the Choose a Room... search box.
- Add additional rooms (if needed) by clicking the + Add Room button.
- Template: Confirm the pre-selected template.
- If another template should be selected, click the dropdown arrow to the right of the Template box to choose a another available template.
- To create a template, refer to Institution Settings: Interview Schedule Templates.
- Click the blue Build button in the lower right corner to save and build the interview schedule!
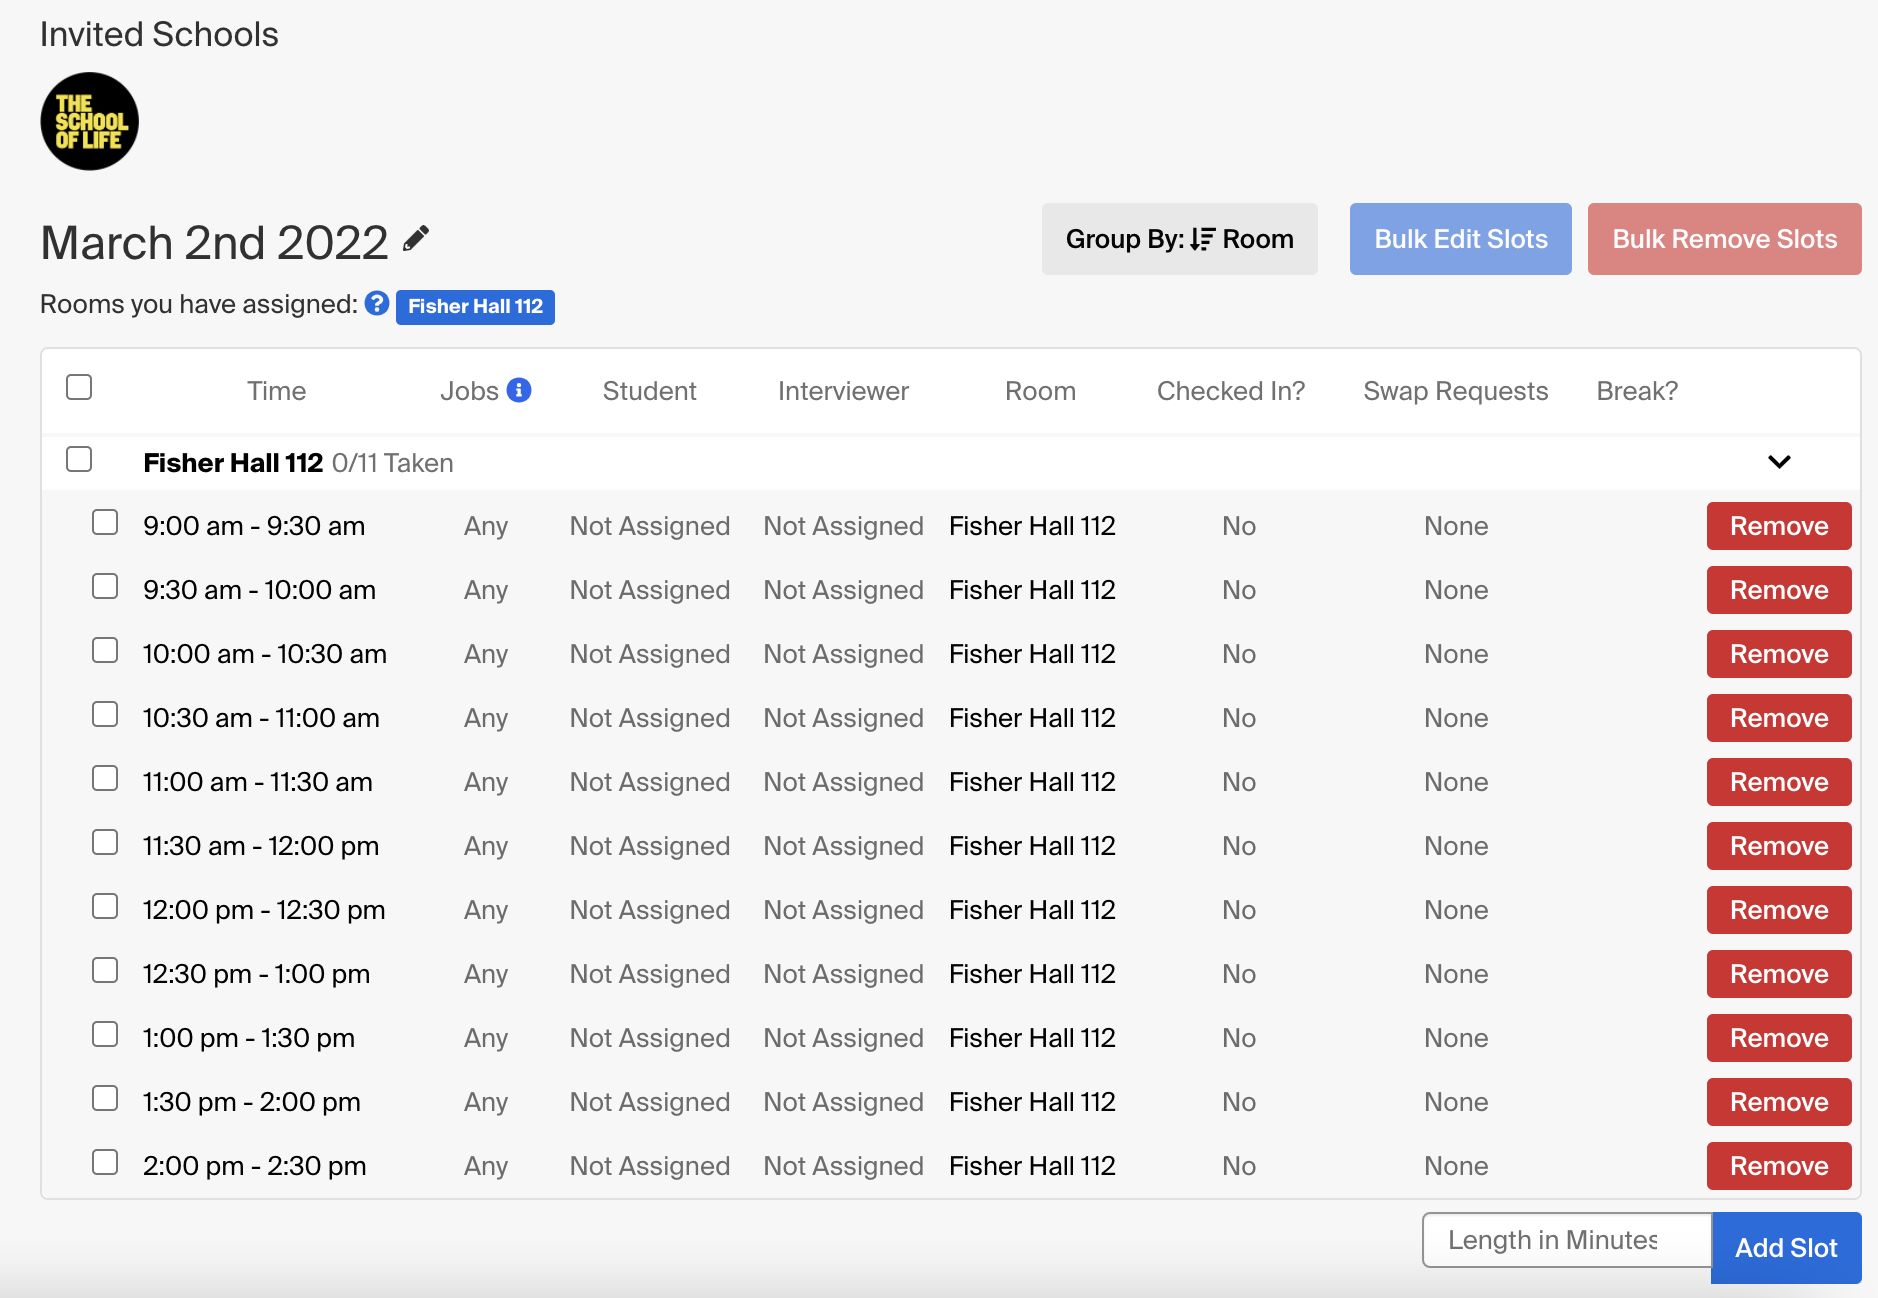
Once you have assigned a room and built the schedule, slots will appear on the Interview Details page, below the date.