
We've put together this guide to help you host the most successful Virtual Fair possible via Handshake.
If your institution is planning to host both in-person and virtual fairs, check out our resource Best Practices: Hybrid Fairs!
For more information on how to support students and employers day-of, please refer to Virtual Fairs: Day-of the Fair.
Setup checklist and testing guide
This guide is to help you prepare for a successful virtual fair for employers and students.
After configuring your settings for a virtual fair, follow the steps to test managing a virtual fair well in advance of your event.
Step 1: Create and Configure Your Career Fair in Handshake
 Create the Virtual Fair
- Create your virtual fair and configure all fair-related settings. See Virtual Fairs: Creation for more information and guidance on creation.
Best Practice: Create all relevant surveys to add to your fair for students and employers, before creating your career fair. See Creating & Testing Surveys for help creating surveys.
Best Practice: While creating this fair, make sure that you select Hide this career fair from employers so that it won't appear in the list of fairs as eligible for registration! Once you've tested and made sure that the settings are just right, you can uncheck this option.
- Payment Options within Career Fairs: There are two ways to handle payments for your career fairs in Handshake, credit card and manual payments:
Credit Card: In order to use credit card payments you must integrate with Stripe, TouchNet or CASHNet and have your “Payment Preferences” school settings configured. See Payments System Setup and Testing Guide for a step by step guide to setting up payments.
Manual: You can specify instructions for employers to be able to pay with cash, check, or link to external payment method, like PayPal. If you use this option you will manually need to mark employers as paid in Handshake as you receive their payment.
Best Practice: Set Your Default Invoice message: This is the message that employers will receive along with their invoice. This will prevent you from having to type out this message multiple times when creating & sending invoices.
Best Practice: Select “Approve employers before invoicing”. This will allow you to automatically be prompted to create and send invoices for your employer once you mark their registration as approved.
Configure Your Fair’s Registration Types
- Set registration types that employers will be able to select and register for.
- Note: Until registration types are created, employers will not be able to register. If you would like more information on creating your registration types, check out Fairs: Create Registration Types!
Best Practice: If you would like to have “Early Bird Pricing” for career fairs, we recommend setting up separate registration types for Early Bird, Regular, and Late, add the appropriate amount of each type, and have the registration types available during the correct time frame.
Best Practice: If you want to charge different prices for employer types such as sponsors, non-profits, etc, then you can configure the registration types to have different prices and be named accordingly “Non-Profit” or “Employer Partner / Sponsor”.
Setting Student Qualifications and Invite Only
- Student Qualifications allow you to filter which students will be able to sign up for the fair. Qualifications can be set by school year, GPA, major, college or any labels. If you would like all students to have the opportunity, you can disregard this step! If you use qualifications, all students can still see the fair, but only those who are qualified can sign up.
- Note: If qualifications are changed after student registrations begin, those already registered will not be able to sign up for any additional sessions. We recommend ensuring desired qualifications are in finalized prior to the registration start.
- Invite Only will make your fair invite only, you will then need invite students on the “student invite” tab. Only these students will be able to see and sign up for the career fair in Handshake.
- Allow students from other schools to attend will allow students from other partner schools (and the Handshake Open Network) to sign up for group or 1:1 sessions with employers. For more information on sharing a fair, see Sharing an Event or Fair with an Additional School.
Send Invite to your Employers
See Fairs: Inviting Employers for a step-by-step guide to inviting employers.
Your career fair has been created and settings have been configured, it’s time to invite employers!
Be ready to approve employers that request to attend the fair. Similar to managing employers and jobs, setup saved searches to filter requests.
Once employer registrations are approved, the schedule owner will receive an email to set their schedule.
Best Practice: Keep an eye on schedule creations and student signups! See Virtual Fairs: Monitoring Fair Engagement for tips to keep track of engagement!
Step 2: Think you’re ready for a Virtual Fair? Time to test!
Before Getting Started: Make sure you’ve gone through the Payments System Setup and Testing Guide first to configure and integrate your payment system.
Sign up as employer
1. Create an employer account linked to your career services account: Create an Employer Account Associated with Your Career Services Account.
2. Create a test fair.
3. Publish Fair as “Hidden”.

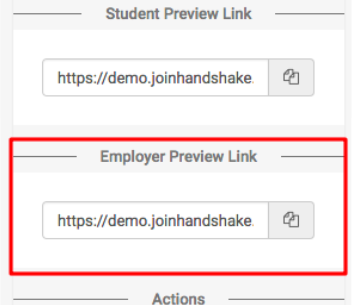
4. Copy the Employer Preview Link.
5. Switch to your employer account and paste link, then request to sign up.
- See Switching User Views for assistance switching accounts!
6. Switch back to your Career Services account to approve the registration.
7. You'll receive an email with confirmation of approval and a link to set your schedule. Creating a Schedule for Virtual Fairs provides steps on how to set a schedule.
8. Receive invoice and make payment if you would like to make sure payments go through. Remember to generate a new invoice if a change is made!
Signing up as student
1. Create a Student Account Associated with Your Career Services Account
2. Set-up fair as invite only.
3. Invite test student account: To do this, start typing the student's name. When you start typing a students name you will see the number of students invited start to narrow down. When you hit "1" you are good to go!
4. Switch to student view, register for the fair, and sign up for group sessions and/or a 1:1 session.
Note: Students will not have a checkin process for virtual fairs - when a student joins a group or 1:1 session, Handshake tracks that as a "checkin" for reporting purposes!
Testing video
In order to test out video, you'll need to either work with a partner, or you can try it out using two different browsers (one to view as a student and the other as an employer).
1. From your employer account, you can launch the session (group or 1:1).
2. From your student account, launch video from the Your Sessions tab.
Best Practice: Fully join the session from either the employer or student view first, then open another browser window, navigate to Handshake, switch user types, then join the session from the other user type!
3. Click through options from each view type to understand the workflow for each user!
Step 3: Workflows and Managing Your Virtual Fair
Approving employer registrations
- Decide what criteria will be used in determining whether or not an employers registration will be approved and the workflow of approving registrations.
- For example, making sure employers attending the fair are also approved at your school, so both they and students get the best experience!
- Check out Fairs: Approving Employer Registrations for more information and steps!
Supporting your employers
- Fair registrants will need to create their company's group and 1:1 sessions, other team members will need to claim their schedules, and there will be on-going schedule management needed as team members are unable to attend, new team members are added, etc. Here are some resources that will help you support employers through that:
If an employer needs assistance via you creating a registration on their behalf, refer to Acting on Behalf of Employers: Registering for a Fair.
We've also added Schedule Representatives as an option to the bulk action Email Registrants/Representatives, from the employer registration page.
Communication with your students
- You can send updates and reminders about your fair to students by using the “Email Student Attendees” feature. This feature can also be used to market your fair by sending emails to students based on invitation, registration, or checkin status, as well as the following new additions:
- Invited but not Registered or Checked In
- Registered and not Checked In
- Registered and no sessions
Day-of support for employers
Have an employer with issues getting connected to audio or video? Use the links below to help them troubleshoot and get connected!
- For common issues employers face, see Virtual Fair: Supporting Employers.
- This is the go-to resource for helping employers troubleshoot their setup: Handshake Video Requirements & Troubleshooting (Employers)
- Check out our Handshake Video Test guide - this is available for both Career Services users and employers!
Day-of support for students
- Consider registering for your career fair from your Career Center's on-campus employer account - this will allow you to configure a schedule for group sessions and/or 1:1 sessions, during which you can offer support and guidance to students. If you do this, be sure to market your booth to students in advance as well, so they know they can come to your session for guidance!
- Make sure you use a naming convention that shows you are available for support, not hiring students! This will help students distinguish.
- You can also use an external source like Zoom to host "drop-ins" - promote this ahead of time so participants know where to go for help!
- Refer to Virtual Fairs: Supporting Students for common issues students face.
For more information on how to support students and employers day of, please refer to Virtual Fairs: Day-of the Fair.
Additional Resources
- Virtual Fairs Engagement Kit for Education Partners
- Career Fairs Help Center
- Resources for Career Services are titled per the following:
- Fairs: indicates an article that is relevant to in-person and virtual fairs
- Career Fairs: indicates an article specific to in-person fairs
- Virtual Fairs: indicates an article specific to fairs hosted virtually
- Resources for Career Services are titled per the following:
- Dedicated Virtual Fairs FAQ article
- Handshake Community - Career Fairs